This easy homemade strawberry Jam recipe تطلي فراولة not only is a money savior, the taste of the homemade jam is much better than any jam you can buy anywhere, or at least that’s how I feel about it.
This jam goes great with my Gluten Free Pancakes.
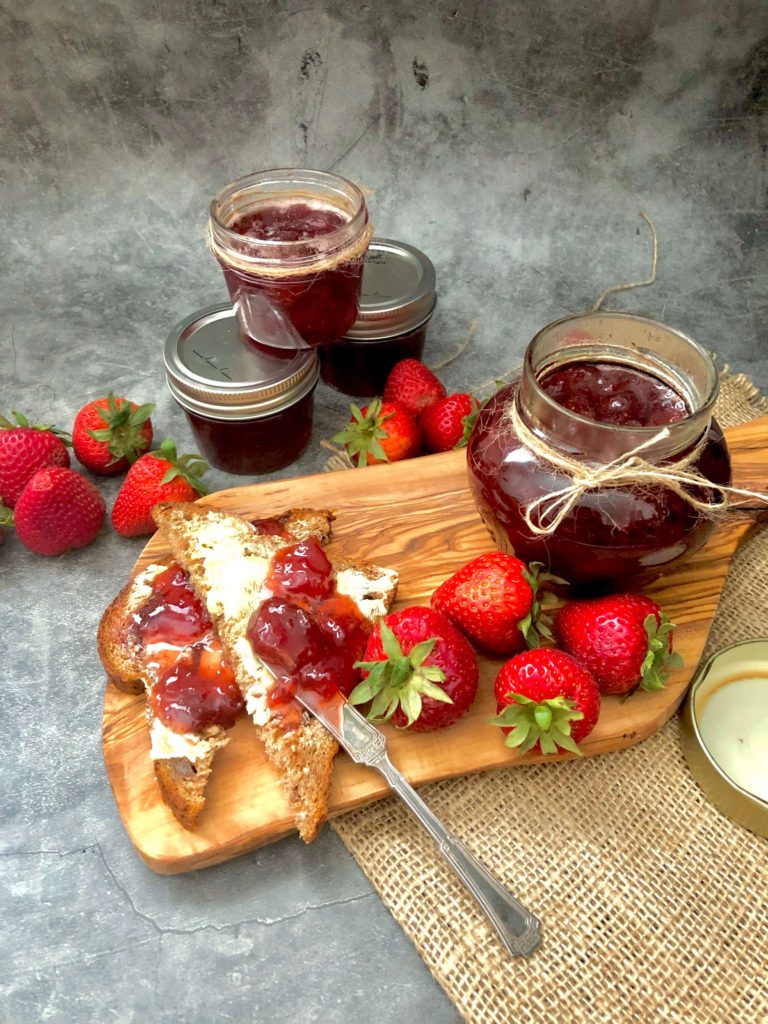
Spring is here and berries are filling the market. Every year I make a few jars of strawberry jam so it can last for the entire year. Strawberry jam is my favorite as well as other members of my family.
As I mentioned in other posts, I do love jam it is my favorite thing in the morning to have on toast with butter along with my coffee. That's my breakfast, I grew up eating. My mother never bought any jam from the store. Also, I think that’s how things were with people making the most of that stuff at home.

When I moved to the US, of course, I needed jam. So many different kinds of jams available at the average US store. They all looked so tempting and interesting. I started trying many different kinds, but none of the ones I bought I liked! I tried some from high-end stores, from Whole Foods, Farmers Markets, organics, fresh..etc. but none of them seemed close enough to what I grew up eating.
Back Story
The idea of making my jam was a bit intimidating, I do remember those days when my mom used to make jam, the entire house would be in high-stress mode lol. “Be careful not to get water into the jam", "don’t enter the kitchen", and "Make sure you stay away from the pot”. The biggest pot in the entire world is sitting on the stove, filled with jam cooking on low heat. Being a big family my mom would make lots of jam during the particular season of a fruit. This quantity of jam would last throughout the year.
Now I understand my mother’s fears behind protecting the jam. If a drop of water enters the jam after it’s completely cooked, this will spoil the jam and won’t last more than a week. Mold will start building inside the jar and it’s not good for anything. So that’s important to remember.
One day by coincidence only, I had some strawberries left in my fridge that I picked up from a farm at a time when I lived in North Carolina. I had so many of them I was tired of eating them. I didn’t want the strawberries to go bad, so I decided to jam them. I washed them, chopped them, and poured some sugar on them. Cooked them on low, and there you go, I ended up with some yummy jam. The good news is that it’s so easy to make. I got so excited and continued to try this method throughout the years.
Prepping strawberry jam:
When it comes to strawberries I prefer to use the organic ones since studies have shown that berries absorb big quantities of chemical fertilizers.
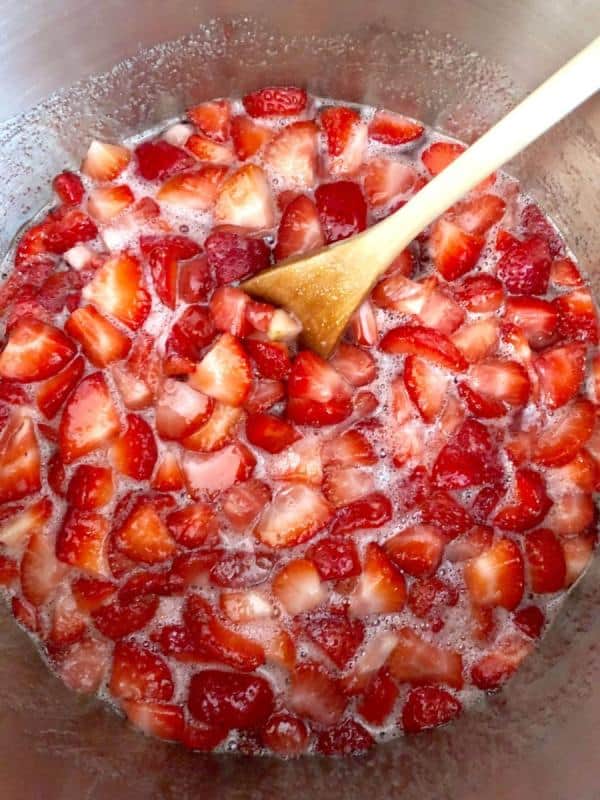
Wash the strawberries well then cut the stem out and chop them into small cubes. Once all of the strawberries are chopped use a measuring cup to fill the pot. Make sure to count how many cups you end up with. It’s usually recommended to use an equal amount of cups of sugar to cups of strawberries.
I don’t like to use so much sugar so I used half the amount of sugar in cups of strawberries. I tend to measure by eye when I make jam, I think the trick is in the cooking. However, for this recipe, I measured this time. Having about 2 pounds of strawberries, turn out to be 8 cups after chopping I used 4 cups of sugar.
Cooking
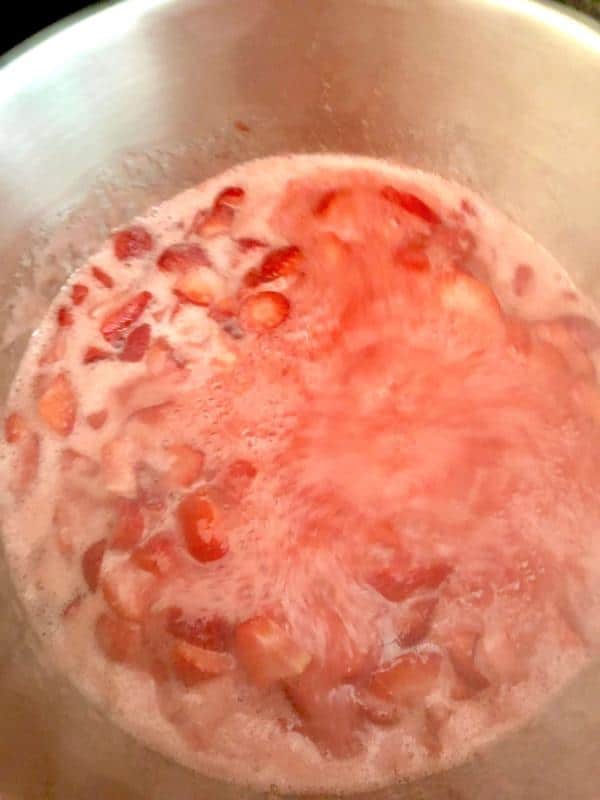
Place the strawberries in a pot and cover them with sugar. Turn the heat on high, and keep stirring until the sugar dissolves. Once the mixture starts boiling turn the heat to low and with occasionally stirring once every 15-20 minutes. Continue until the mixture is thick and not runny. That's why I keep this step to around 1 hour.
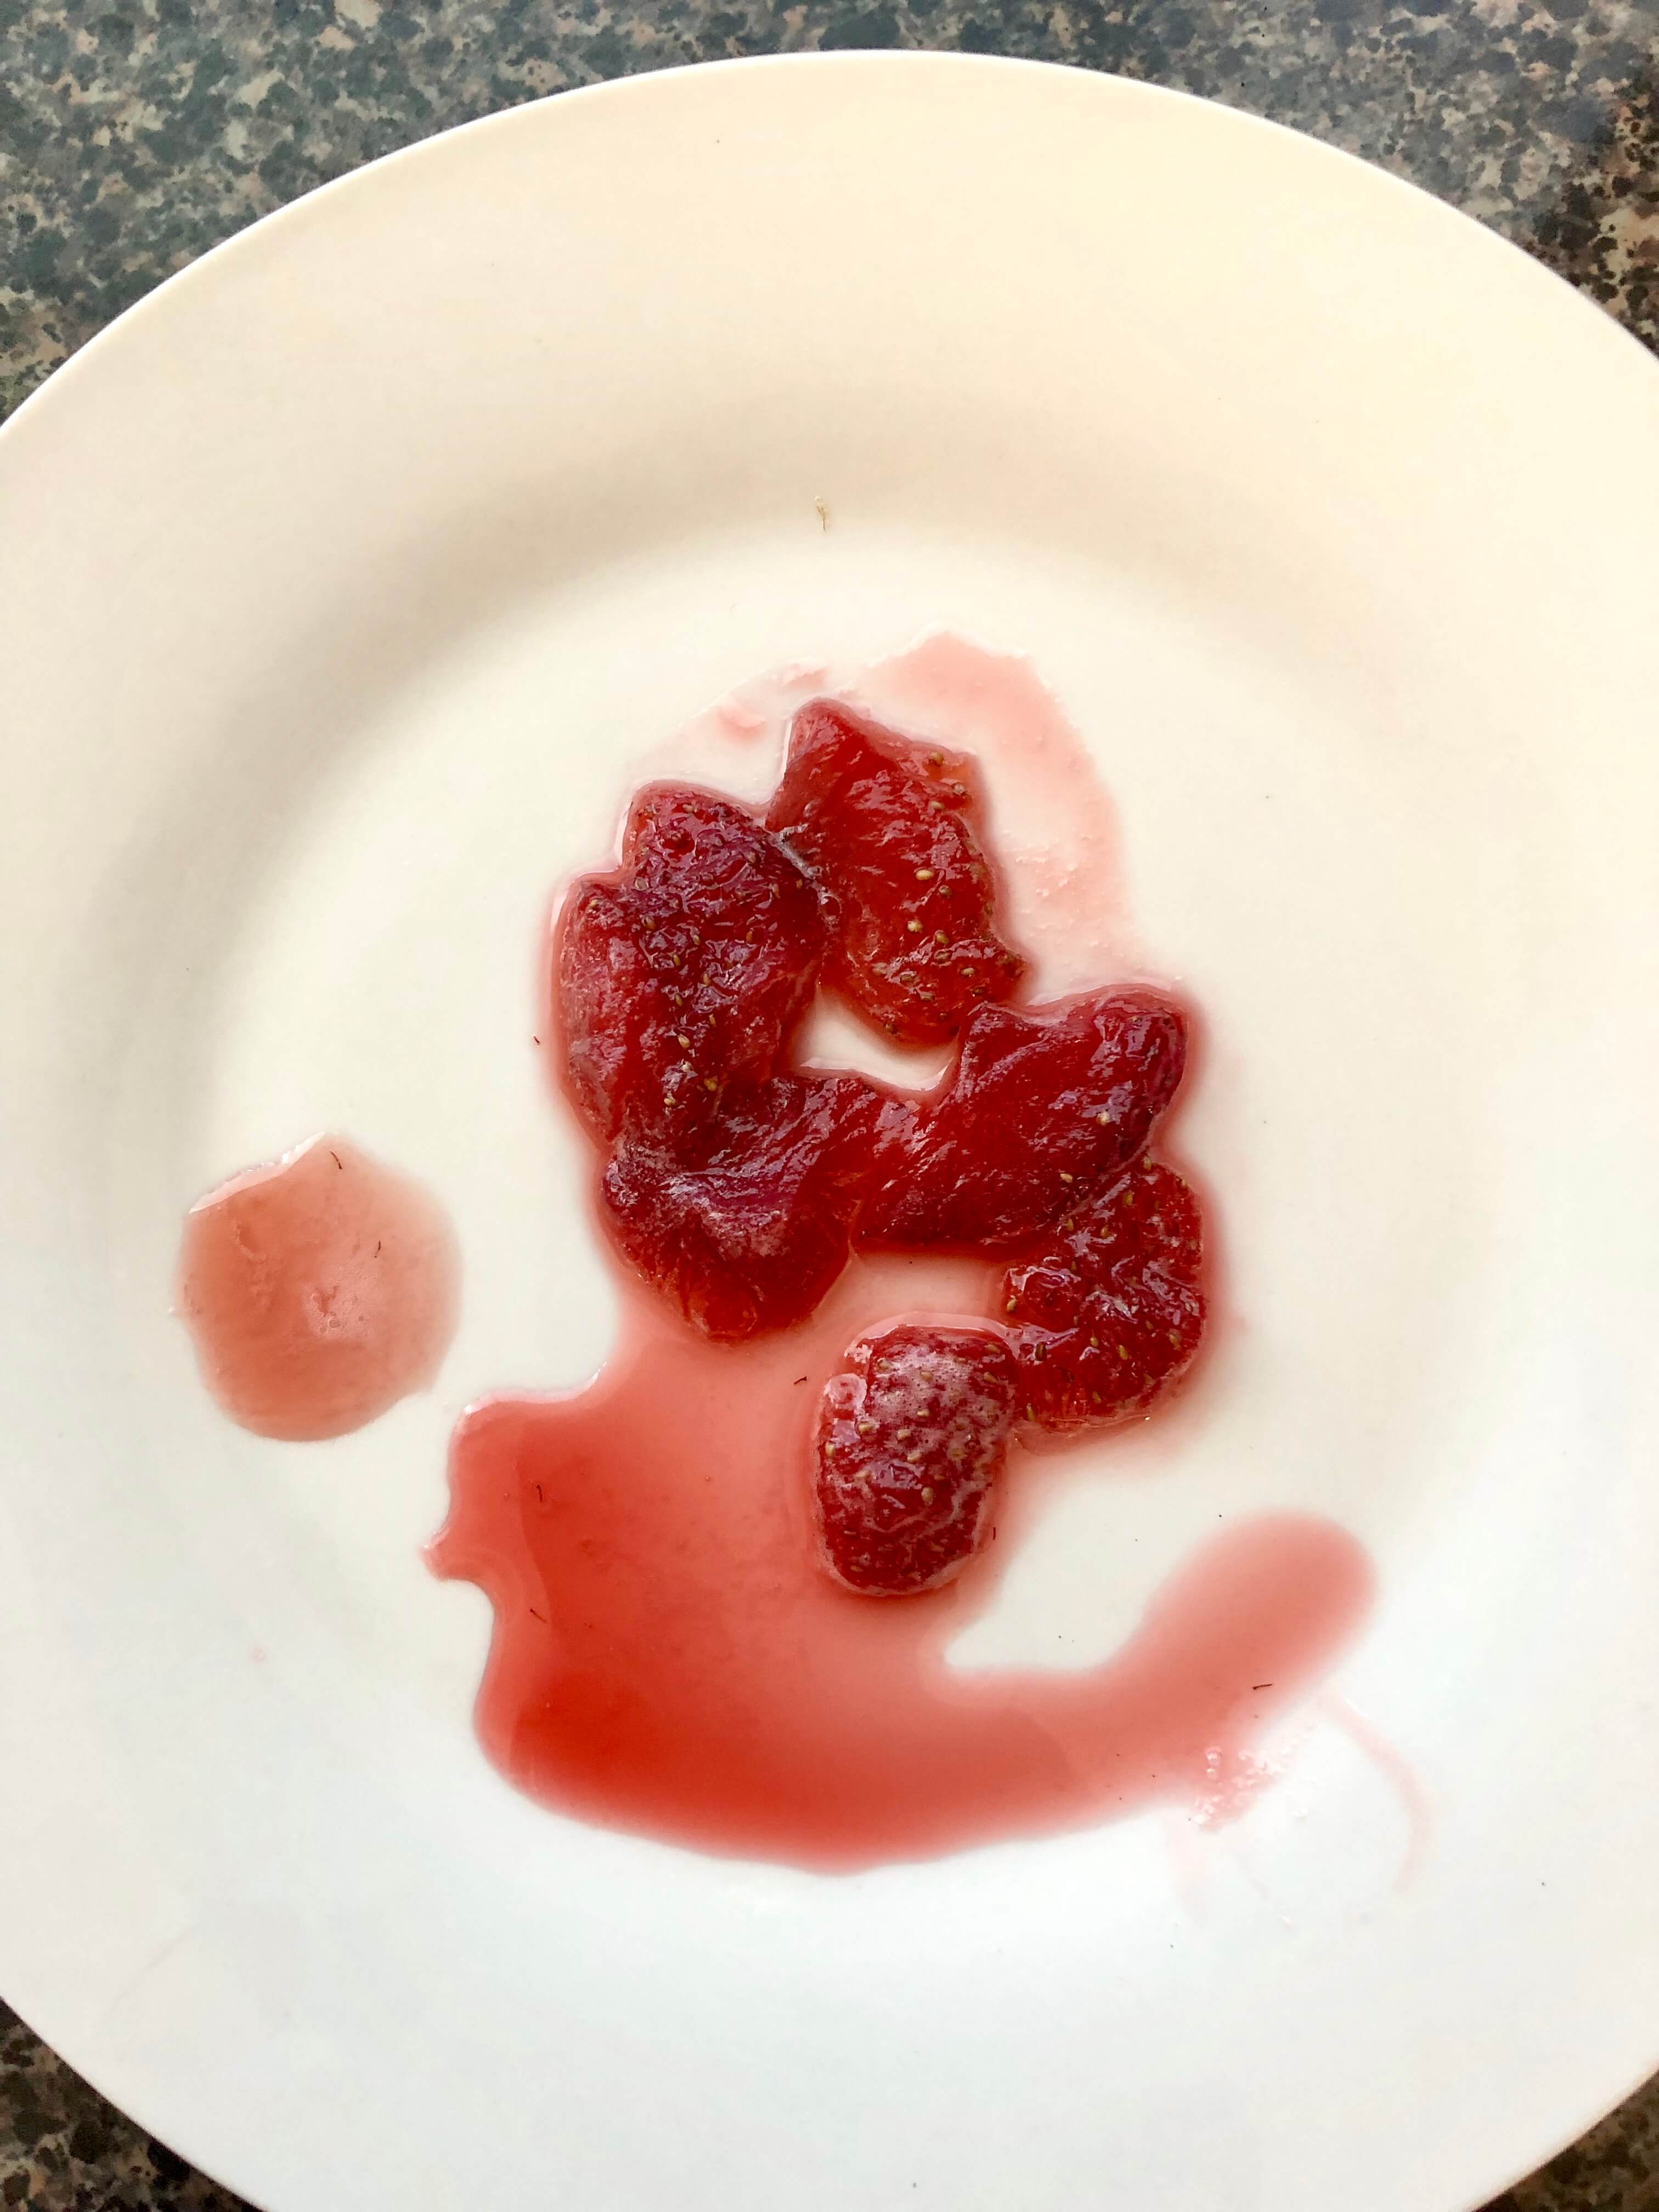
Test the consistency of the jam by taking a small amount of jam with a clean dry spoon and placing it on a plate. Let it cool off to check the consistency. In my jams, I do not use any preservatives. That's why the extra cooking time helps with preserving the jam. However, I do store them in the refrigerator, which can last up to one year.
Once the jam is at the proper constancy turn the heat off and let it cool. The jam should cool for about 10 minutes. It is very important to pour the jam into jars before it is completely cooled off. Make sure the jars are clean and fully dry. What's important with the jam is that no water will come near it after it's cooked, otherwise it'll be spoiled and won’t last long.
Pour it into jars and leave the jars uncovered until it’s fully dry. Jars can be covered with a towel and left until the next morning to be sealed with their original cover. Jam can be stored in the fridge and last up to a full year.
This makes about 3-5 small jars, depending on the size of the jar.


My Homemade Strawberry Jam it's Extremely Simple and Delicious
- Prep Time: 20
- Cook Time: 120
- Total Time: 2 hours 20 minutes
- Yield: 3 -5 small jars
- Category: Breakfast
- Method: Preserving
- Cuisine: American
Description
Homemade Strawberry Jam تطلي فراولة not only it's a money savior the taste of the homemade jam is much better than any jam you can buy anywhere or at least that’s how I feel about it
Ingredients
- 8 cups of chopped strawberries
- 4 cups of sugar
Instructions
- Wash strawberries well and rinse with water.
- Cut stems out and chop into small cubes.
- Pour sugar over strawberries and place in a large pot on high heat, stir well and once it starts boiling turn the heat on low.
- Continue this process for about one hour with occasional stirring once every 15-20 minutes.
- Jam's consistency can be tested by taking out some with a clean spoon and place on a plate.
- Turn off the heat and let it cool off for about 5-10 minutes, then pour the jam into small clean jars. Make sure the jam is not touched with any water.
- Keep the jars uncovered until they’re fully cooled off.
- Cover jars and place in the fridge.
- They can last up to a full year in the fridge.
George Murphy says
Hello, I am George and I am the Outreach manager at happyfreestuff.com. I wanted to reach out to see if you would possibly want to collaborate with us and we can help you capture interested buyers for your business. Basically what we will do is feature your products on our website and send out to our email list of around 100k subscribers. You can capture the data and market them your products with discount offers. That will definitely bring you good business. Apart from that, we will help you promote your business across the internet and since you will be getting loads of mentions that will boost your search traffic from Google too. The best thing is that we don't charge anything for this collaboration and we do it to bring value to our audience so it will be a win-win situation for both parties. If you are interested, please reply back and we will talk further. Have a good day. Regards George Murphy Outreach Manager - HappyFreeStuff
Alana says
I love how simple this dressing is. Everyone loved it.
Wafa Shami says
Hi Alana, great to hear, thank you!